
Genuine Honda Oxygen O2 Sensor 36532-PWE-G01/36532-PWE-G0x – Expert Fitment Guide, Testing & Pro Install Tips | G-Sparts
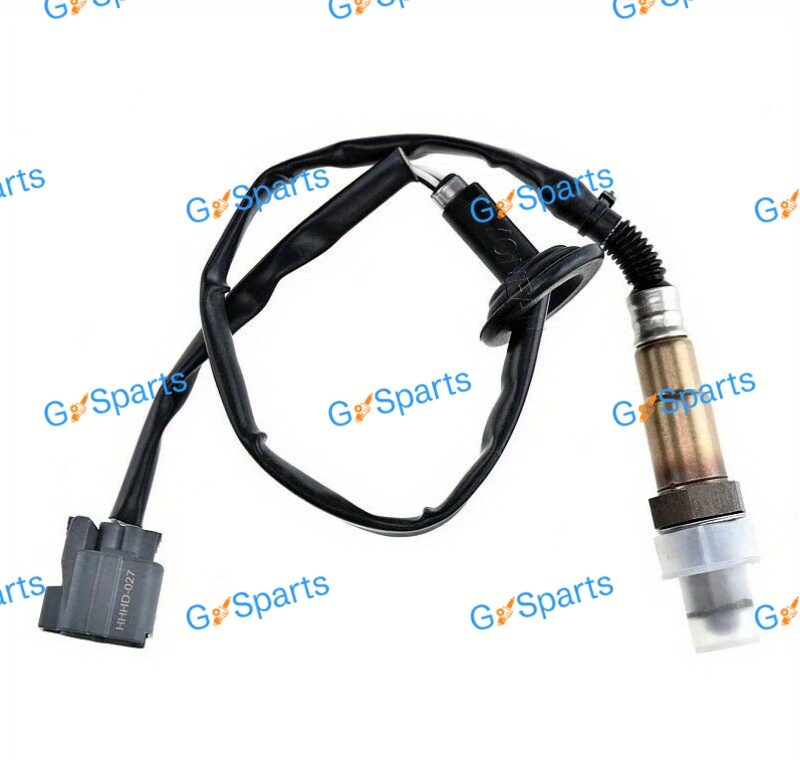
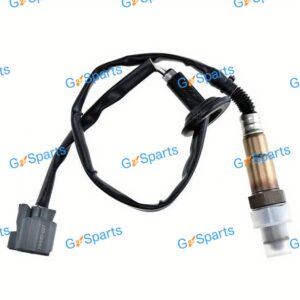
O₂ sensor for Many Civic / Accord / CR‑V layouts (downstream part numbers vary) – Downstream / post‑cat. Specs: Often 1–3 wires; connector & probe length vary by exhaust layout.
Did you like this product? Add to favorites now and follow the product.

(+86) 180 07 12 47 38 WhatsApp, Telegram, WeChat
Description
OE‑style oxygen (lambda) sensor listing for Honda applications. Models: Many Civic / Accord / CR‑V layouts (downstream part numbers vary). OEM/reference(s): 36532-PWE-G01 / 36532-PWE-G0x. Position: Downstream / post‑cat. Typical specification: Often 1–3 wires; connector & probe length vary by exhaust layout. Brands/cross‑refs: Bosch 0‑258‑00xxx / Denso downstream refs. Fitment guidance: Downstream vs upstream matters; confirm with VIN/engine code. Source: eBay.
Why Upstream Oxygen Feedback Shapes Everyday Drivability
Precise fuel control depends on fast, accurate feedback from the upstream oxygen sensor. It measures oxygen content in exhaust so the ECU can trim fueling around stoichiometric, stabilizing idle and smoothing throttle transitions. As elements age, switching slows and trim swings widen, especially on cold mornings. You might notice subtle surging during steady cruise or a light fuel smell after start-up. Restoring a crisp signal returns the polished manners most drivers expect from a well-maintained Honda. This guide walks through identification, diagnosis, installation, and verification so you can finish the job confidently the first time. For clarity and accuracy, we’ll reference the exact identifier you’re researching: Honda Oxygen O2 Sensor 36532-PWE-G01/36532-PWE-G0x.
What the Part Number Encodes and Why Precision Matters
Factory identifiers capture connector indexing, heater wattage, lead length, thread pitch, and the zirconia cell’s switching characteristics. A near-match might bolt up yet deliver the wrong warmup curve or voltage behavior, leading to nuisance codes or drawn-out adaptation. Compare pin count, keyways, and loom clip locations against your car before ordering. When you’re certain the label matches Honda Oxygen O2 Sensor 36532-PWE-G01/36532-PWE-G0x, you’re aligning both geometry and calibration. That precision safeguards catalytic converter health, reduces diagnostic noise, and keeps drivability consistent. If your catalog notes multiple supersessions or regional variants, verify with the emissions label under the hood and inspect the existing plug shape. Correct selection avoids forced fitment and protects wiring longevity with Honda Oxygen O2 Sensor 36532-PWE-G01/36532-PWE-G0x.
Fitment Verification: Simple Visual Checks Before Buying
Start by locating the upstream bung and confirming access from above or below. Photograph harness routing, including stand-offs, clips, and heat shields, because those small parts prevent insulation fatigue. Count connector pins, examine the indexing rails, and measure the lead length so the replacement reaches each clip without tension. Note the angle between the sensor body and plug; it influences how the lead naturally “drapes” when torqued. Compare your observations to catalog photos and notes. When physical cues align with documentation, installation becomes routine rather than risky. This prep ensures the new component seats cleanly, seals properly, and routes safely—essential foundations for a first-time-right result with Honda Oxygen O2 Sensor 36532-PWE-G01/36532-PWE-G0x.
Subtle Symptoms of a Tired Upstream Sensor You’ll Notice First
Aging oxygen sensors usually fade rather than fail overnight. Early clues include a small drop in fuel economy, faint surging at steady speeds, and a check engine light that appears after long highway runs. Cold starts may linger in open loop, causing a gentle stumble or fuel odor until the element warms. On a scan tool, waveform switching slows and amplitude narrows while short-term trims swing wider to compensate. Left alone, these patterns stress the catalytic converter and may trigger efficiency codes. Replacing the upstream unit restores quick toggling and steadier trims, making the car feel calmer in traffic and more consistent between weather swings with Honda Oxygen O2 Sensor 36532-PWE-G01/36532-PWE-G0x.
Data-Led Diagnosis with Scan Graphs and Simple Meter Checks
Warm the engine fully, then graph upstream voltage beside short-term trims at a steady suburban cruise. Healthy control shows brisk, rhythmic switching with trims hovering near zero. Lazy toggling, flat-lined voltage, or delayed recovery after small throttle changes points to a tired element—or an external fault like an exhaust leak. Verify heater resistance, supply voltage, and ground integrity. Inspect loom sections near shields for abrasion and hardened insulation. If power, ground, and plumbing are sound but the waveform remains sluggish, replacement is justified. After installing Honda Oxygen O2 Sensor 36532-PWE-G01/36532-PWE-G0x, re-log the same route to confirm faster transitions and tighter trims. That before/after comparison is your most persuasive proof.
Tools, Supplies, and Prep for a Clean, Predictable Job
Preparation turns exhaust work from frustrating to straightforward. Gather a quality oxygen-sensor socket, 3/8-inch ratchet with extensions, a torque wrench, penetrating oil, brake cleaner, dielectric grease for the connector seal, and fresh loom clips if originals are brittle. Plan access: some bays allow removal from above after moving an intake duct; others require raising the vehicle and removing a shield. Keep the new part sealed until the engine is cool and the bung is clean. Good lighting and a wobble extension help maintain alignment. With the bench set and photos of routing on your phone, you’ll install Honda Oxygen O2 Sensor 36532-PWE-G01/36532-PWE-G0x smoothly and avoid cross-threading that leads to leaks later.
Safe Removal Techniques That Protect Threads and Wiring
Heat cycles can seize threads, so timing matters. Warm the manifold briefly, then let it cool to a safe touch to gain expansion without burns. Apply penetrating oil and give it minutes to wick in. Keep the socket square and use steady pressure rather than hammering, which rounds flats. As the sensor breaks free, unwind the body while keeping the lead untwisted to protect internal conductors. Once removed, brush carbon from the bung gently; aggressive chasing risks altering the seat. With the site clean and threads intact, the replacement will start by hand, seal evenly, and torque accurately—your best defense against future leaks when installing Honda Oxygen O2 Sensor 36532-PWE-G01/36532-PWE-G0x.
Installation Sequence: Start by Hand, Torque Correctly, Route Safely
Begin threading by hand for several turns to confirm alignment; cross-threading a bung is a costly detour. If the new unit arrives with pre-applied compound, don’t add more—excess can migrate to the tip and poison the catalyst coating. Torque to specification so the crush washer seals without deforming the bung. Route the lead along the original path, reinstalling stand-offs and clips to maintain clearance from the downpipe and moving parts. Listen for a positive connector latch and tug gently to confirm retention. A final flashlight sweep verifies slack for engine rock and avoids chafe points, setting up long-term reliability from Honda Oxygen O2 Sensor 36532-PWE-G01/36532-PWE-G0x.
Post-Install Reset: Clear Codes and Refresh Adaptations Properly
Fresh hardware deserves fresh data. Clear stored faults and reset fuel trims so the ECU can learn from clean inputs. Let the engine idle until the fan cycles once, then hold a steady neighborhood cruise while you watch upstream switching and short-term trims. You’re looking for crisp oscillation and tight trim swings centered near zero. Avoid hard accelerations during the first minutes while the catalyst equilibrates. If your platform specifies an idle learn or speed-hold routine, perform it now. With accurate feedback restored by Honda Oxygen O2 Sensor 36532-PWE-G01/36532-PWE-G0x, drivability typically smooths within a short errand loop and inspection monitors begin progressing predictably.
Drive Cycle Strategy to Confirm Readiness and Repair Quality
A deliberate route validates your work and sets readiness efficiently. Start with a complete warmup, then maintain a steady, moderate speed for several minutes while logging upstream voltage and trims. Add gentle accelerations and decelerations to observe transient recovery, followed by a short idle. Stable switching, quick recovery after throttle changes, and centered trims indicate success. If you face inspection soon, follow your platform’s speed and coolant windows precisely. With Honda Oxygen O2 Sensor 36532-PWE-G01/36532-PWE-G0x providing reliable upstream data, readiness usually completes without drama, and the car regains the polished, factory-fresh feel that makes daily driving easy.
Avoiding Common Installation Pitfalls That Cause Comebacks
Most comebacks trace to preventable oversights. Over-torquing can distort the bung and create micro-leaks that mimic mixture issues. Contaminating the tip with lubricants slows response. Misrouting the harness near radiant heat hardens insulation and sets the stage for intermittent faults. Skipping minor strain-relief clips allows vibration to fatigue internal wires. Prevent all of this by hand-starting threads, torquing to spec, reinstalling heat sleeves, clicking the latch, and confirming slack with the engine rocked by hand. Finish with a brief data check to prove success. Done carefully, you’ll preserve the clean signal path expected from Honda Oxygen O2 Sensor 36532-PWE-G01/36532-PWE-G0x.
Selecting OEM vs Aftermarket: Metrics That Actually Matter
Upstream placement is unforgiving, so pick by data, not paint or price alone. Ask about switching speed at defined lambda steps, heater wattage curves, insulation temperature ratings, and exact lead length. Avoid universal kits that require splice connectors; added resistance and moisture risk can skew readings. Direct-fit pieces preserve routing and reduce install time. For predictable warmup behavior and calibration alignment, many owners choose Honda Oxygen O2 Sensor 36532-PWE-G01/36532-PWE-G0x. That selection minimizes adaptation delays, reduces nuisance codes in winter, and supports long-term catalyst health—practical advantages that outweigh small price gaps between brands.
Performance and Tuning Context: Why a Healthy Narrowband Still Matters
Even if you log with a wideband during calibration, daily closed-loop operation uses the factory upstream narrowband to refine fueling constantly. If that signal is slow or biased, transient fueling suffers and the car feels inconsistent despite a solid tune. Before dyno time, eliminate exhaust leaks, clean grounds, and verify brisk switching during light sweeps. Replace questionable components proactively so your logs are clean. With reliable feedback re-established by Honda Oxygen O2 Sensor 36532-PWE-G01/36532-PWE-G0x, tuners can focus on throttle mapping, spark blending, and knock limits rather than fighting noise from a drifting upstream reference.
Fuel Economy and Emissions: The Immediate Payback You’ll See
A responsive upstream signal centers trims and reduces wasted fuel, especially during gentle throttle where most driving occurs. When feedback lags, enrichment and enleanment overshoot, wasting energy and stressing after-treatment. Renewing the sensor tightens control so the engine reaches and maintains stoichiometric quickly after cold starts. Drivers typically notice steadier cruise, more predictable tip-in, and fewer fuel smells. Tailpipe results improve as the catalytic converter operates inside its designed comfort zone—all expected outcomes when the waveform is restored to factory speed by Honda Oxygen O2 Sensor 36532-PWE-G01/36532-PWE-G0x.
Catalyst Protection: Safeguarding an Expensive Component
Catalysts thrive on balanced mixtures and fast corrections. Rich spikes overheat the brick; lean spikes invite misfire under load. A sluggish upstream reference forces the converter to mop up larger errors, narrowing your margin of safety during towing, steep climbs, or hot weather. Replacing a tired sensor restores brisk oscillation around stoichiometric, easing the converter’s workload and stabilizing emissions performance. Most owners also notice smoother idle after cold starts. Viewed against downstream replacement costs, refreshing the upstream with Honda Oxygen O2 Sensor 36532-PWE-G01/36532-PWE-G0x is cost-effective insurance.
If Problems Persist: Structured Troubleshooting Beyond the Sensor
When drivability quirks remain after a proper install, broaden the scope.Honda Oxygen O2 Sensor 36532-PWE-G01/36532-PWE-G0x. Inspect for exhaust leaks ahead of the bung that draw air and fake lean readings. Smoke-test the intake for vacuum leaks, validate MAF or MAP plausibility, and confirm fuel pressure under load. Scope the upstream signal if possible; latency during quick blips should be minimal. Verify heater power and ground under current draw, not just static. With those fundamentals confirmed and Honda Oxygen O2 Sensor 36532-PWE-G01/36532-PWE-G0x known good, look to injectors, ignition, or software updates rather than replacing parts blindly.
Buying Online Smartly: Listings, Photos, and Return Policies
Trustworthy listings show the actual connector keyway, lead length, thread treatment, and heat-shield geometry—not just generic art. Specs should mention heater profiles and operating temperature range. Read recent reviews discussing fit, routing, and readiness success after installation. Save screenshots of the page and unboxing photos with your receipt for support. When the product page and packaging both identify Honda Oxygen O2 Sensor 36532-PWE-G01/36532-PWE-G0x, you reduce compatibility risk and streamline any warranty conversation. Reliable supply chains treat delicate ceramics carefully from shelf to door, which matters more than flashy packaging.
Anti-Counterfeit Checks: Red Flags to Spot Before You Wrench
Counterfeits can mimic appearance while missing the heater curve or switching speed your ECU expects. Inspect labels for crisp printing, consistent fonts, and traceable batch codes. Compare connector molding and indexing rails with your original. Look for uniform plating on the shell and a clean, undamaged crush washer. Reputable vendors publish real photos and specs. If anything seems off—damaged packaging or misprints—pause before installation. Selecting a verified source for Honda Oxygen O2 Sensor 36532-PWE-G01/36532-PWE-G0x protects your time and prevents chasing phantom drivability issues caused by substandard elements.
Shipping, Storage, and Handling to Preserve Sensor Integrity
Treat the zirconia element like glass. Choose shipping that cushions impacts and inspect boxes for crushed corners before opening. Keep the sensor sealed in its antistatic sleeve until the engine is cool and the work area is staged. Don’t touch the tip with oily gloves or set it on gritty surfaces; contaminants can poison the catalyst coating. Handle the connector by its body, not the wires, to protect internal crimps. These simple habits ensure Honda Oxygen O2 Sensor 36532-PWE-G01/36532-PWE-G0x installs flawlessly and delivers factory-fresh response from the first key-on after torqueing.
Regional Variants: Emissions Packages and Connector Keys
Global platforms often include region-specific emissions hardware that alters harness routing, plug indexing, or shield shapes even within the same engine family. Imported vehicles and mid-cycle updates complicate catalog lookups. Match by physical features and under-hood certification labels rather than model year alone. Confirm upstream location relative to the converter, note clip positions, and verify pin count before ordering. When those checks align, the ECU accepts the signal immediately, readiness completes smoothly, and the repair feels invisible—exactly what you want from Honda Oxygen O2 Sensor 36532-PWE-G01/36532-PWE-G0x.
Budget Planning and Total Cost of Ownership Perspective
Beyond the sensor price, include a dedicated socket, penetrating oil, dielectric grease, replacement clips, and time for a validating drive cycle. Balanced against these minor investments are steady idle, improved fuel use, fewer diagnostic detours, and reduced risk of catalyst replacement. Viewed over months, the value is compelling. Choosing Honda Oxygen O2 Sensor 36532-PWE-G01/36532-PWE-G0x aligns up-front cost with durability and predictability, minimizing repeat labor and preserving the calm, consistent manners you expect from a well-maintained Honda in all seasons.
Fast Answers to Common Owner Questions
Can cleaning revive a slow upstream sensor? You can wipe exterior grime, but internal aging or contaminated coatings won’t regain switching speed reliably—replacement is the durable fix. Do you need anti-seize? Use only factory pre-applied compound on coated threads or a minimal nickel formula kept away from the tip. Will disconnecting the battery solve the issue? It may clear adaptations briefly but won’t repair a weak signal. The practical solution is diagnosis, leak repair if needed, and installing Honda Oxygen O2 Sensor 36532-PWE-G01/36532-PWE-G0x, then validating results with a short log showing quick oscillation and centered trims.
Building a Maintenance Record That Adds Real Value
Documentation transforms routine service into long-term clarity. Record symptoms, pre-repair codes, and baseline logs, then capture post-install graphs showing fast switching and centered trims. Photograph clip positions and the latched connector, and store the invoice and label for warranty support. Clear records speed diagnosis if another issue appears because you can prove the upstream reference and heater circuit were addressed properly. Listing Honda Oxygen O2 Sensor 36532-PWE-G01/36532-PWE-G0x by name alongside date and mileage eliminates ambiguity for future owners or technicians evaluating the vehicle’s history.
Heat Management, Shields, and Harness Longevity in the Real World
Thermal management is as critical as torque specs. Reinstall any shields removed for access, ensuring they don’t chafe the harness. Replace missing stand-offs and clips; they create air gaps that reduce radiant heat soak. In tight bays, consider reflective sleeves where clearance is minimal. After a hot soak, recheck that the harness still clears edges and the downpipe—expansion can shift relationships. These small habits preserve insulation, prevent intermittent faults, and keep signal integrity high, complementing the robust construction of Honda Oxygen O2 Sensor 36532-PWE-G01/36532-PWE-G0x.
Electrical Integrity: Grounds, Shared Circuits, and Noise Control
Sensor accuracy depends on clean reference and ground paths. Corroded grounds or shared circuit faults elsewhere can mimic sensor failure. Voltage-drop test grounds under load, and inspect shared five-volt references if other sensors show anomalies. Repair poor crimps or splices, and route harnesses away from ignition components to reduce electrical noise. A solid electrical foundation ensures the new sensor’s waveform is judged fairly. This diligence prevents misdiagnosis and lets Honda Oxygen O2 Sensor 36532-PWE-G01/36532-PWE-G0x shine during daily driving and seasonal changes.
Safety First: Lifts, PPE, and Fire Awareness Around Exhaust Work
Exhaust work combines heat, penetrants, and tight spaces. Wear gloves and eye protection, set stands on solid ground, and chock wheels before lifting. Keep penetrant away from hot surfaces, and ventilate the area to avoid fumes. Disconnect the battery if your platform is sensitive to connector cycling or if tools may contact power studs. Having a class B/C extinguisher within reach is smart. A calm, prepared setup reduces risk and protects you and the vehicle while you fit Honda Oxygen O2 Sensor 36532-PWE-G01/36532-PWE-G0x.
Quick Drive Cycle: A Practical Checklist You Can Reuse Anytime
Finish with a compact, repeatable routine: cold start to full warmup, steady 60–80 km/h cruise while logging upstream voltage and trims, gentle accelerations and decelerations to observe transient response, then a brief idle. Confirm no pending codes and that trims remain centered. Back in the bay, recheck clip engagement and heat clearances with the engine hot. If logs show crisp switching and the dash stays quiet, the job is complete—your confirmation that Honda Oxygen O2 Sensor 36532-PWE-G01/36532-PWE-G0x restored the feedback loop you count on daily.
Supplier Vetting and Warranty Support for Peace of Mind
Choose sellers who publish detailed photos of the connector, indexing rails, and thread treatment, plus clear specs on heater behavior and temperature ratings. Reviews that mention correct wire length, proper routing, and successful readiness after installation are valuable. Keep unboxing photos alongside receipts for fast support. When every touchpoint—product page, packing slip, and label—names Honda Oxygen O2 Sensor 36532-PWE-G01/36532-PWE-G0x, you reduce uncertainty and set yourself up for a first-time-right repair that stands up to daily use.
Environmental Stewardship: Recycling the Retired Component Responsibly
Oxygen sensors Honda Oxygen O2 Sensor 36532-PWE-G01/36532-PWE-G0x. contain metals and ceramics that should re-enter productive use, not landfills. Many municipalities accept them through e-waste programs or parts stores that aggregate recycling. Keep the old unit intact, wipe off fluids, and deposit it responsibly. Pair this with cardboard recycling from the new part’s packaging to reduce the job’s footprint. Responsible disposal complements the efficiency gains you just restored by installing Honda Oxygen O2 Sensor 36532-PWE-G01/36532-PWE-G0x and reflects the same care you invest under the hood.
When to Partner with a Professional for Certainty and Speed
Most enthusiasts can complete this service with patience and the right tools, yet some scenarios warrant professional help: recurring correlation faults suggesting shared references, suspected ECU issues, or drive-by-wire platforms requiring guided adaptations. A qualified shop brings scopes, calibrated meters, smoke machines, and platform-specific procedures that shorten diagnosis and prevent guesswork. Arriving with Honda Oxygen O2 Sensor 36532-PWE-G01/36532-PWE-G0x ensures the technician installs the correct unit and focuses effort on validation rather than sourcing, minimizing downtime and maximizing confidence.
Final Road-Test Wrap-Up: Confidence You Can Feel Immediately
Conclude with a calm verification drive: neighborhood speeds to listen for leaks, a steady cruise to watch trims and switching, and a brief idle to confirm stability. After a hot soak, take a final look at harness clearances and shield placement. If logs show crisp oscillation and trims hug center, consider the job done. Note mileage and conditions in your records for future reference. With Honda Oxygen O2 Sensor 36532-PWE-G01/36532-PWE-G0x installed correctly and validated, your Honda regains the refined, predictable manners that make commuting effortless and long trips pleasantly uneventful.
External Resources (Standards & Technical References)
- SAE J1979 — OBD-II Diagnostic Test Modes
- ISO 15031 — Road Vehicles/Scan Tool Communication
- US EPA — Basic Information on OBD-II
- NGK/NTK — Oxygen (Lambda) Sensors Overview
- Bosch Mobility — Oxygen Sensor Technology
Related Internal Links
Additional information
| OEM / Reference | 36532-PWE-G01 / 36532-PWE-G0x |
|---|---|
| Brands / Cross | Bosch 0‑258‑00xxx / Denso downstream refs |
| Models | Many Civic / Accord / CR‑V layouts (downstream part numbers vary) |
| Position | Downstream / post‑cat |
| Specifications | Often 1–3 wires; connector & probe length vary by exhaust layout |
| Fitment note | Downstream vs upstream matters; confirm with VIN/engine code. |
| Source | eBay |
Related products


G-SPARTS – Leading Auto Parts Supplier Since 2009
Trusted by 1000+ Clients Worldwide | Chinese (BYD, Geely, Chery, …), Japanese (Toyota, Honda, Nissan, …), European (BMW, Mercedes, VW, …) & American (Ford, Chevrolet, Tesla, …) Car Spares | Best Prices & OEM Quality | 15+ Years Expertise | Professional Team, Fast Global Shipping
Copyright 2025 © G-Sparts All Rights Reserved. | Premium Chinese Auto Parts Supplier – Worldwide Shipping | Best Prices on OEM & Aftermarket Spares

Reviews
There are no reviews yet.